Create Combined Sections
You can combine sections if you need to offer two or more separate classes as one class offering. This feature can be used for dual offerings of the same course (both graduate and undergraduate) or courses within different subject areas.
To offer both courses in the schedule of classes each semester, yet have the courses be taught as a single class (with one instructor, one location, one meeting pattern, etc.), you can combine sections. You can combine sections permanently or for a single class occurrence.
You can also combine sections within or across subjects. When classes are linked to a combined section, they are all given the same Event ID. The enrollment capacities are controlled both at the section level and at the sections combined level.
Note: If the Combined Section is already defined on the Combined Sections Table, navigate to Curriculum Management, Combined Sections, Identify Combined Sections to link the combined sections.
Creating Combined Sections
Navigate to Curriculum Management, Combined Sections, Combined Sections Table.
- Enter the term in the Term field.
- Click on the appropriate Session.
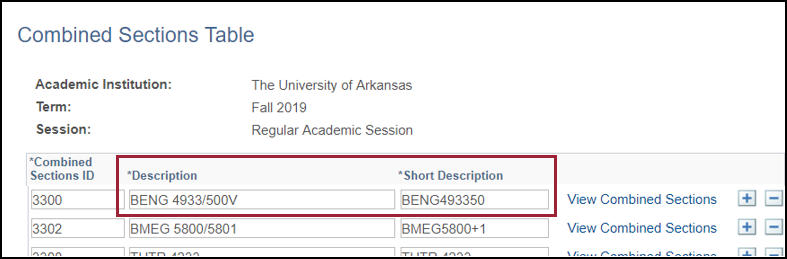
- The Combined Sections Table appears. Click on the Description header to sort in alphabetical order.
- Click plus
 to add a new row.
 - Type the course name and number in the Description field. This is a required field.
- Type a short description in the Short Description field. This is a required field.
- Click Save.
- Repeat steps 3 through 6 for each class.
- To offer more than one section of a class, insert additional rows of data for that class. Use the format: subject, catalog number, section. Example: BENG4203 1, BENG4203 2
- When the record is saved, the View Combined Sections link will appear. Click the link to go to the Identify Combined Sections page.
Linking Combined Sections
Link classes to the Combined Sections ID. This is the unique identifier for each combined sections record.
If you are not using the View Combined Sections link on the Combined Sections Table, navigate to Curriculum Management, Combined Sections, Identify Combined Sections.
- Select a combination type from the Combination Type drop-down menu. Available values are:
- Both - Courses to be combined can be considered within subject and cross subject.
- Cross Subject - Courses to be combined are not within the same subject area.
- Within Subject - Courses to be combined are within one subject area.
- Check the Permanent Combination check box if this is a permanent combination.
Example: All dual-credit courses are permanent combinations. When the box is checked, the combination will roll forward each term with the prior term copy process. - Check the Skip Mtg Pattern & Instr Edit check box to combine sections with different meeting patterns and instructor information.
Note: Requested Room Capacity should be left blank in UAConnect to avoid scheduling errors in 25Live Pro.
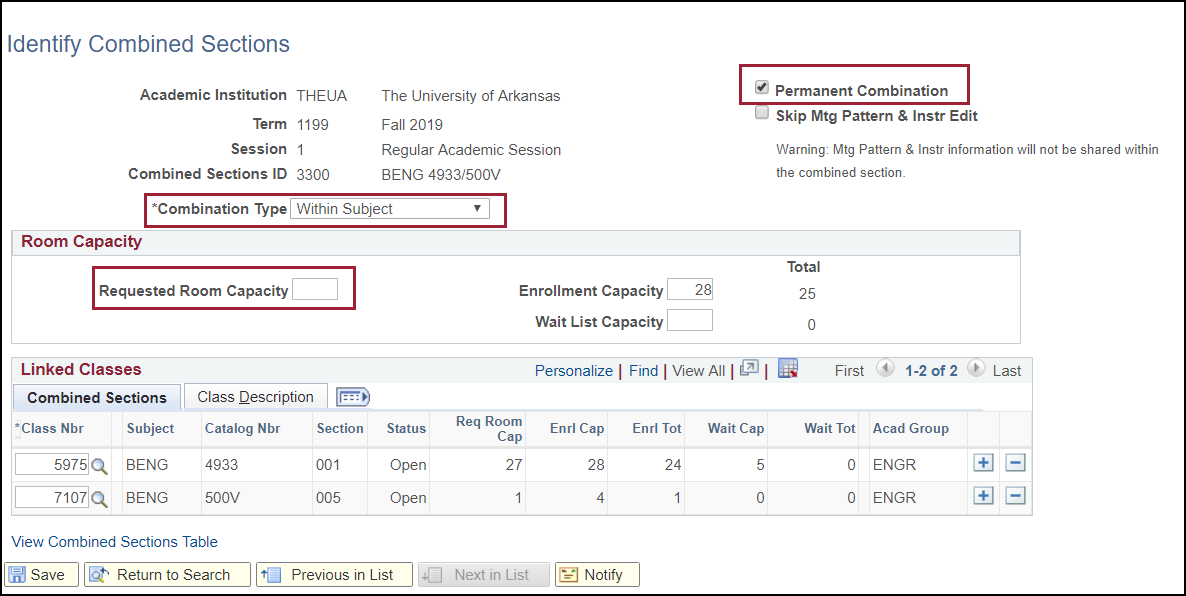
- Enter the enrollment capacity for the combined sections in the Enrollment Capacity field.
The Enrollment Capacity field controls the total number of students allowed to register in the class. For example, a total enrollment number of 30 only allows a total of 30 students to enroll, regardless of the number entered in the enrollment capacity in the individual classes that are combined. If the Enrollment Capacity field for the combined sections is 30 and the individual sections each have an EnrlCap of 30, only 30 students will be able to enroll in the class.
Wait List Capacity is being used in a limited number of departments. If the class is to be set up to allow students to add the class with a status of "waiting", the maximum number of students allowed to be on the wait list for the combined sections should be entered here. - Type in the class numbers of sections to combine, or click the magnifying glass icon to look up the number.
- The Class Description page has a summary of the information provided on the Combined Sections Table page.
- Click Save.