Student Group Updates
Security must be in place to view, add, or remove students from student groups. Information provided for updating student groups includes:
- Add a student to a student group
- View the students in a student group
- Inactive a student in a student group
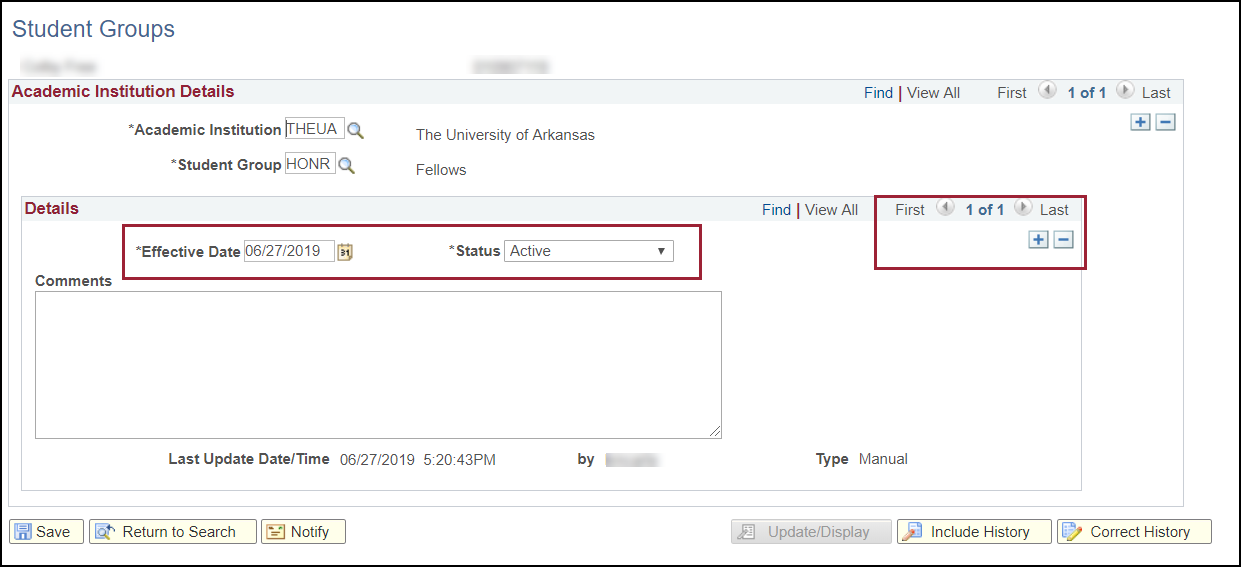
Add an Individual to a Student Group
Navigate to Records and Enrollment, Career and Program Information, Student Groups.
- Enter the search criteria for the student you wish to update.
- If the student does not have any entries for Student Groups, a blank page is displayed
to enter the student group data.
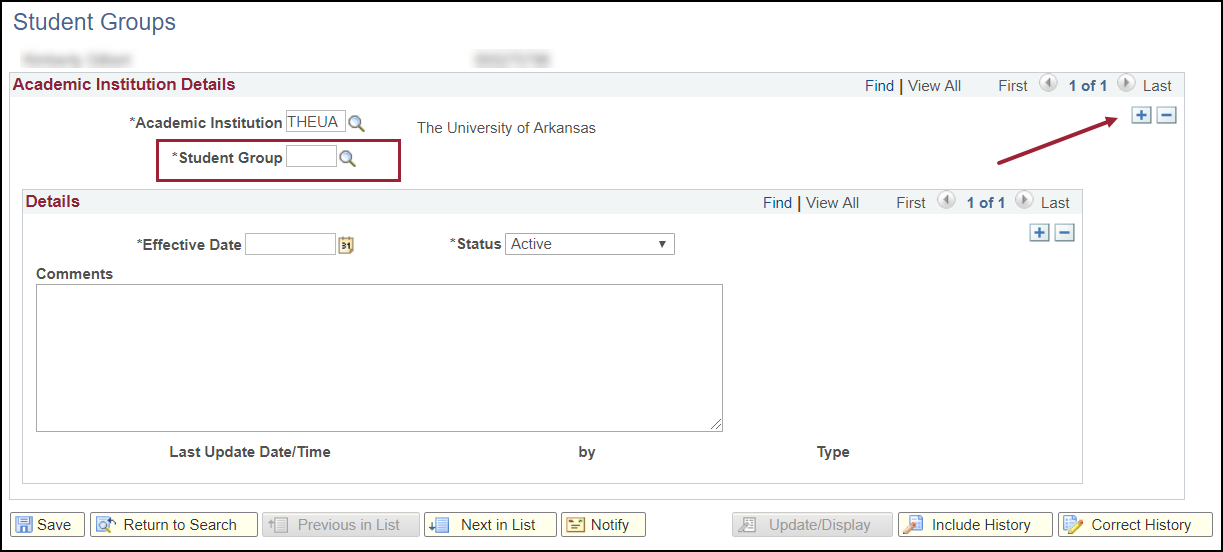
- If the student has entries for student groups, click the plus button in the upper right section of the screen to add a new row of data.
- Enter the student group code in the Student Group field, or click the magnifying glass icon to view the student groups to which you have access.
- Once the student group is selected, press the Tab key to exit out of the field.
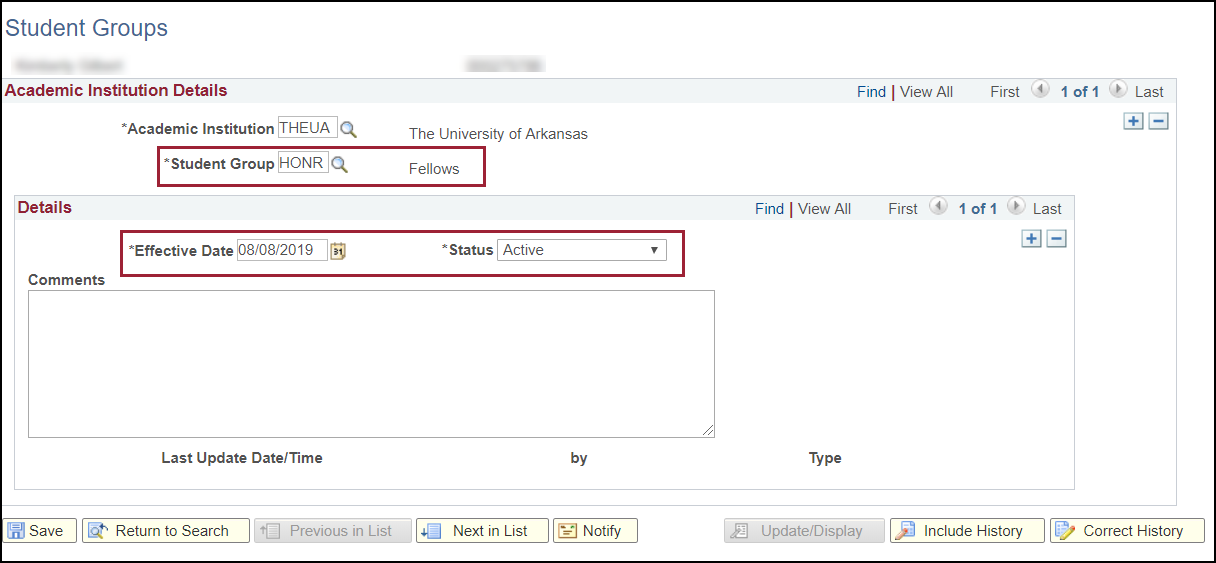
- The Effective Date field is populated with the current date, and the Status field defaults to Active. The effective date can be changed as needed.
- Comments may be added as needed.
- Click Save.
- Click the Return to Search button to add additional students to the group.
View a List of Students in a Student Group
Navigate to Records and Enrollment, Career and Program Information, View Student Groups by Student.
- Enter the student group code in the Student Group field, or click the magnifying glass icon to view the available groups.
- Parameters can be set on this page to select portions of the student group to view or to view the entire group.
- Click the Select Effect Dates drop-down menu to view the options available for selecting the Effective Dates. Selecting
an option for range causes activation of additional fields on the pages for data entry.
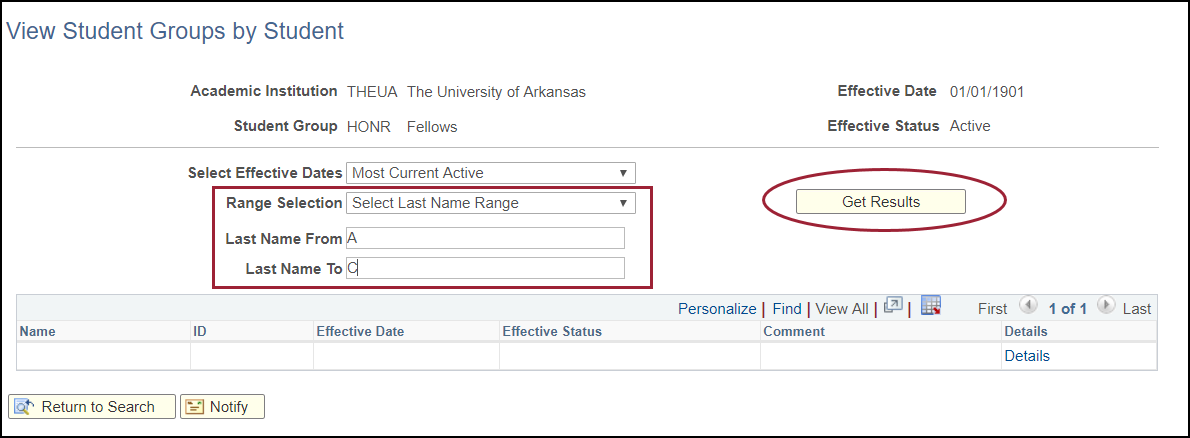
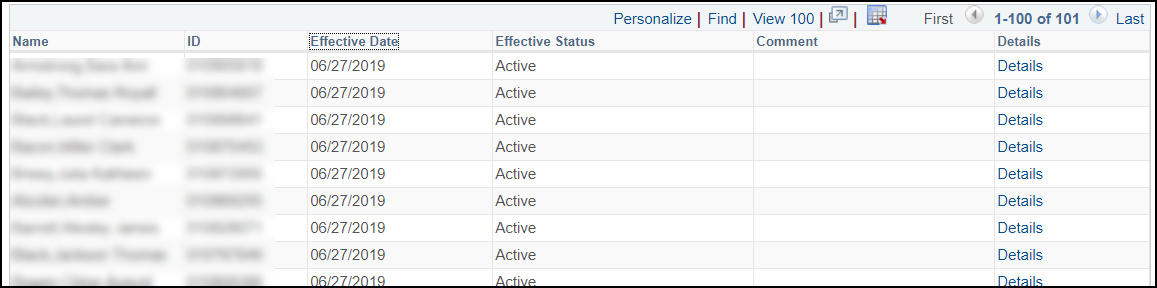
- Once the effective date and/or range selection is set, click the Get Results button. Results are displayed.
Inactivate an Individual in a Student Group
Navigate to Records and Enrollment, Career and Program Information, Student Groups.
- Enter the search criteria to locate the student requiring an update.
- If only one row of data exists for the group to be updated, click the plus button in the Details section of the page. If the student has multiple student groups, find the appropriate row to update by clicking on the directional arrows to go forward or backward. When the appropriate row is displayed, click the plus button for that row of data.
- Enter the appropriate Effective Date for the inactivation and change the Status to Inactive.
- Click Save.