Enroll in Class
Enrolling in a class is a multi-step process that includes selecting and confirming
your course selections with verification that you have read all the Class Notes. In
addition, all classes that are not taught face-to-face must have a predominant location
identified as to where the course will be taken.
Adding a Class
- Click the Manage Classes tile on the Student home page.
- Click Enroll to start the enrollment process.
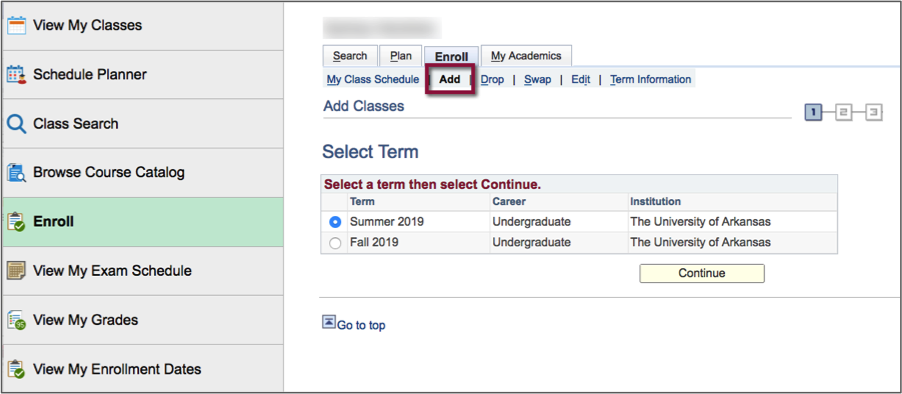
- Click the Add tab to begin your class search. If more than one term is open for enrollment or enrollment
changes, you will be offered a choice of terms. Select the appropriate term from the
options, and click Continue.
- If you know the class number of the course, enter it in the Enter Class Nbr field and click Search. Note: There is a difference between the class number and the course number:
- The class number is tied to a specific section of a class that is found in parentheses next to the class. For example, the class number for Spanish 2003-910 is 7852.
- The course number is a four-digit number that immediately follows the subject. For example, the course
number for Spanish 2003-910 (7852) is 2003.
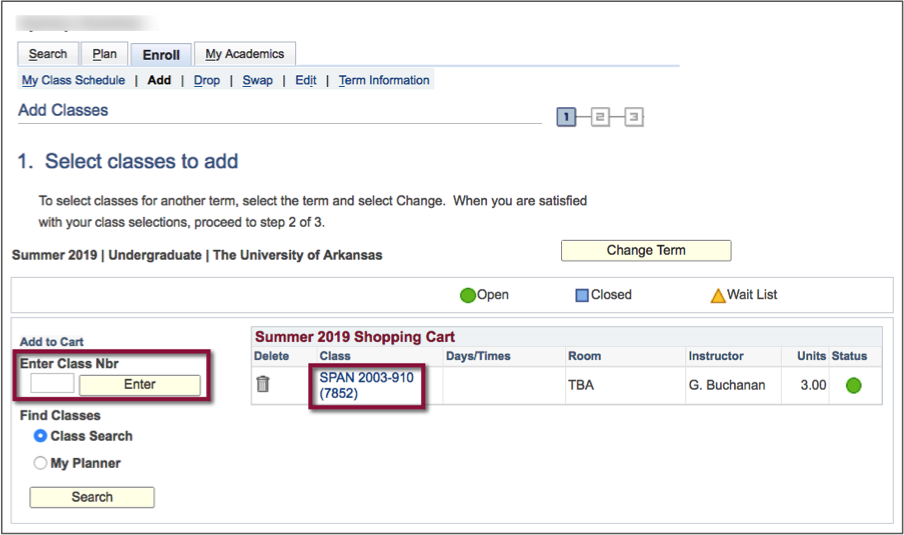
- To find all classes, click the Class Search radio button. Click Search to open the Class Search page.
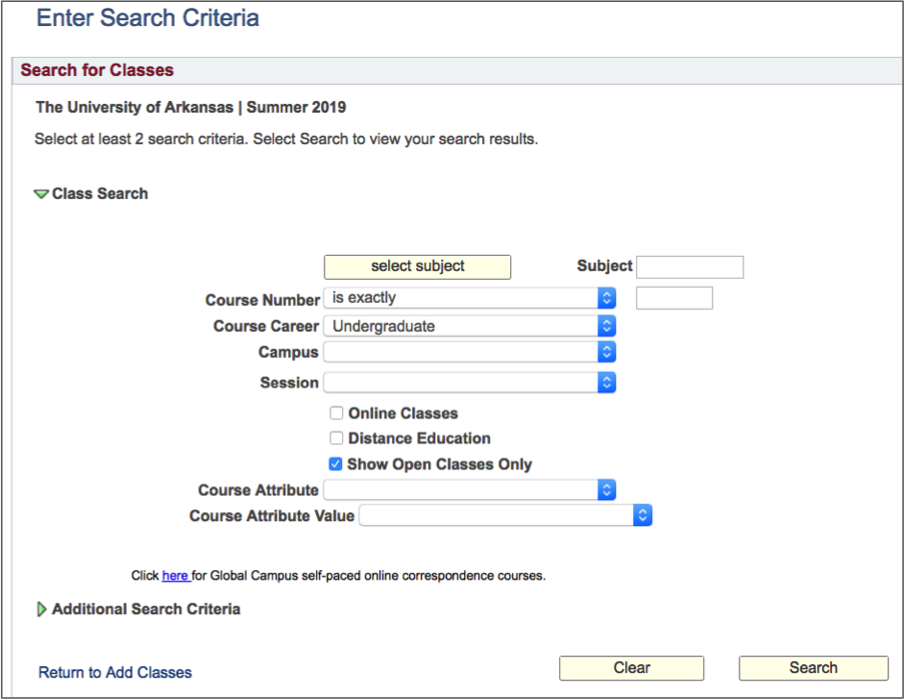
Entering Search Criteria
The Class Search Criteria section requires at least two search criteria to perform your search.
- Select your Course Career from the drop-down menu on the Search for Classes page. Selections are Agricultural Law, Continuing Education, Graduate, Law and Undergraduate.
- Type the value in the Course Subject field, if known (see 4 above). If unknown, click the Select Subject button to see a listing of course subjects.
- Click the first letter of the desired subject. The Course Subject Lookup page displays all the subjects that fall under the letter you selected.
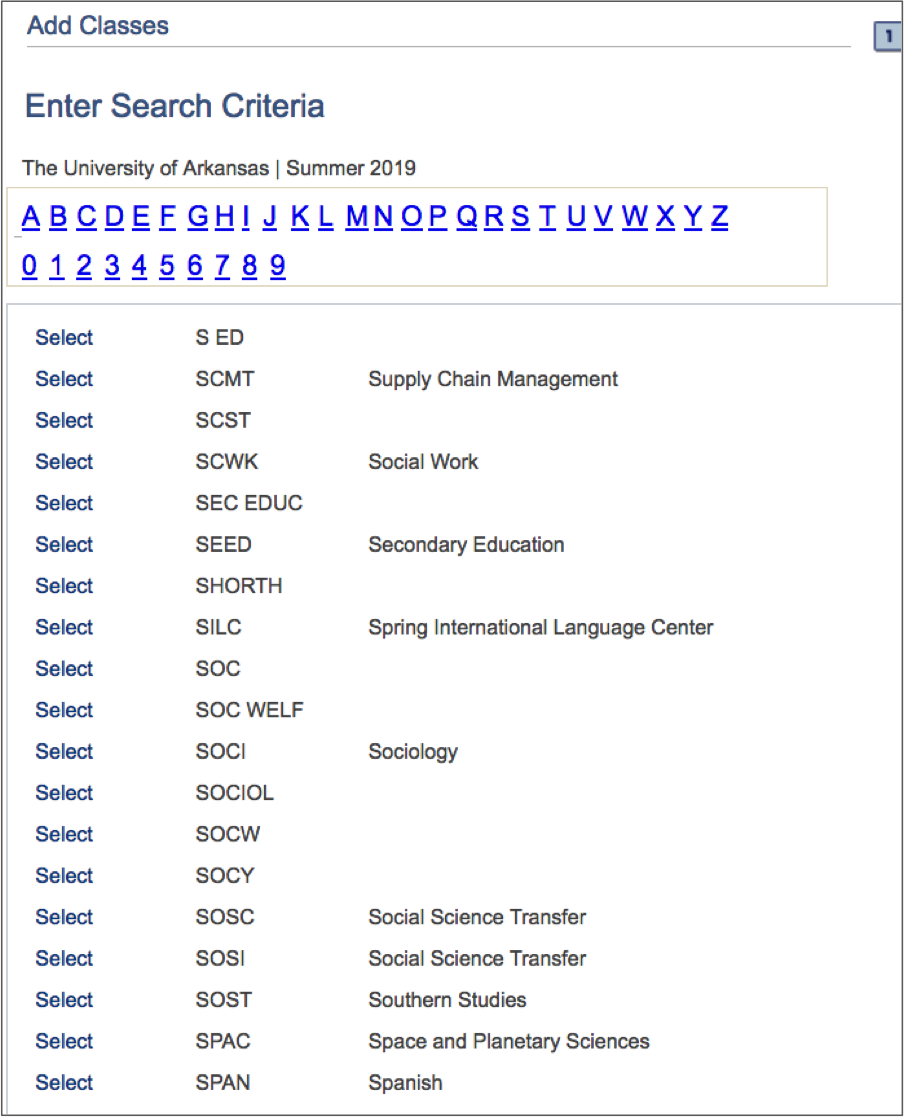
- Click the Select link next to the subject, and return to the Enter Search Criteria page that now has the Subject field populated with your selection.
- Click Search.
- The Search Results page opens with the results of your course subject search.
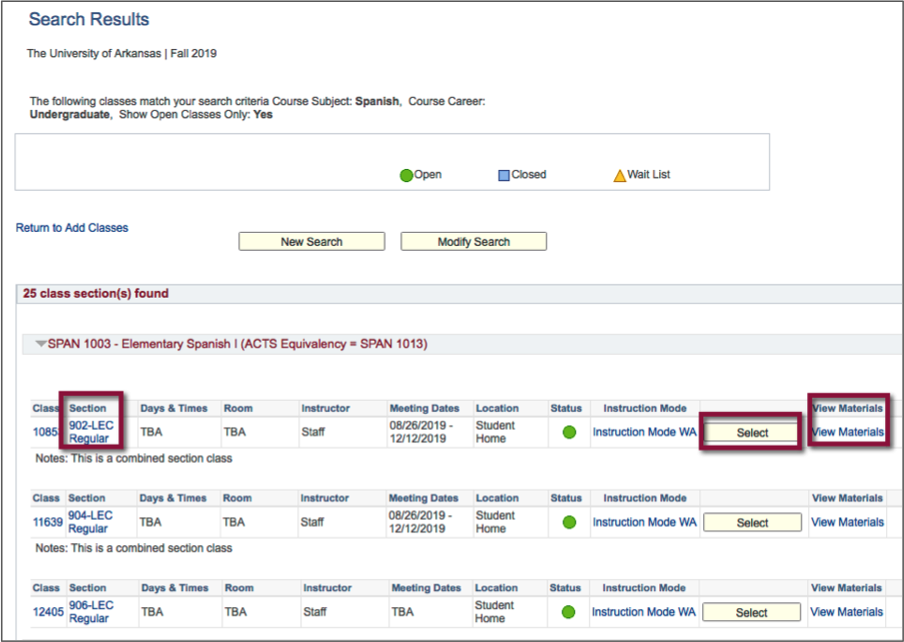
- Select the Section link to view more details about the class on the Class Detail page.
- Click the View Materials link to see textbook information.
- Click the Select button to add the course to your shopping cart. Select any required drill or lab associated with the class, and click Next.
- After completing your selections, the Enrollment Preferences page opens, providing additional class information. Click Next to select additional classes or to complete your registration.
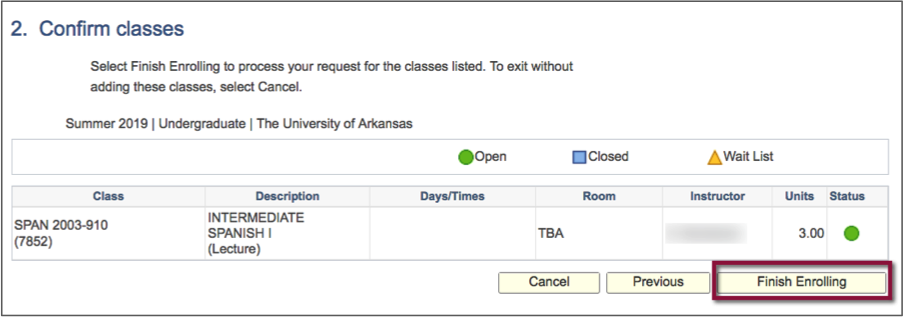
- When you are satisfied with your selections, click Proceed to Step 2 of 3 to confirm.
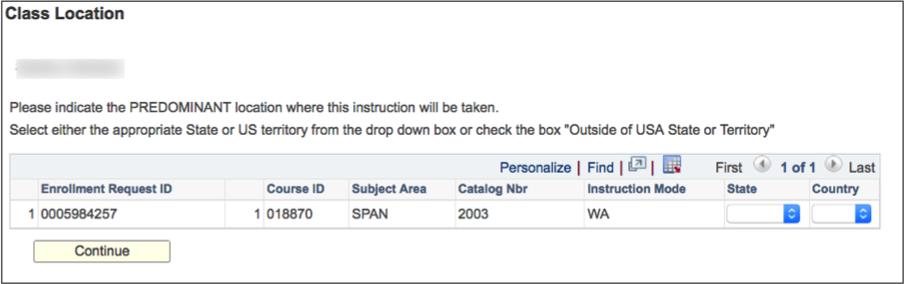
- If you are enrolling in a class that is not taught face-to-face, the Class Location page opens. You will be required to select the State and Country in which the class or classes will be taken.
Note: You may not proceed with enrolling in classes until this step is completed.
- Click Finish Enrolling to complete your enrollment.
A green check mark in the Status column indicates the class was added successfully.
A red X will appear if there was an error in adding the class, which will require an action to correct.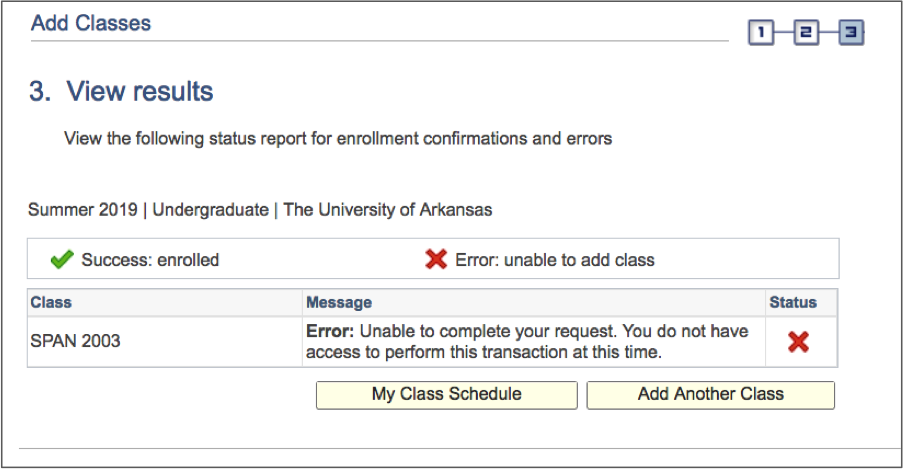
- Click My Class Schedule to return to your Class Schedule page. The class is now officially on your schedule.